


Watch this quick video guide for how to setup primary / general / good picture profile settings on the Sony a6300 camera. These can be used to get the same results on a Sony a7s camera if you have one of those already.
Below are some basic general / primarily used picture profile settings for every day usage. They are not too flat but good for post-processing with a good amount of room to get the color effects you want to bring in later to get good results.
Daytime/Daylight/normal light:
Gamma: Cine 4
Back Level: +5
Color Mode: Cinema
Saturation 0
Detail Level 0
Darker/Night
Gamma: Cine 2
Back Level: +5
Color Mode: Cinema
Saturation 0
Detail Level 0
Event’s with a lot of LED light (blue tint)
Picture Profile = off (PP off)
Creative Style = Light
—————————–
Events (Fix the blue light problems)
Turn the Picture Profile off and go back one menu option to the Creative Style. You can then choose Light
————————————–
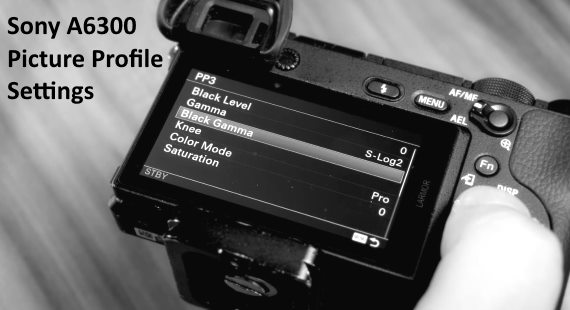
Good / organic Slog2 settings
Slog2 PicPro:
Black Level: 0
Gamma Slog: 2
Black Gamma = Range: Middle , Level: -3
Knee = Mode: Auto , Auto Set = Max Point: 95 , Sensitivity: Mid
Colore Mode: Pro
Saturation: +8
Color Phase -2
Color Depth = R+1, G-1, B+2,, C-2, M-1, Y-3
Detail = Level, -5 Adjust = Mode; Manual, V/H Balance: -2, B/W Balance Type3, Limit: 0, Crispening:0, hi_light Detail: 0
White balance = Manual = Grid setting B 1 (one to the left)
The Sony A6300 can be found here.
The music is very distracting and interferes with the important information your trying to give!
What should be the white balance setting when using Cine2/Cine4?